It’s a wonderful adventure to start using WordPress on your Ubuntu server to build a dynamic online presence. Most people use WordPress for its intuitive user interface and wide range of personalization options. It is the perfect system to manage content for blogs and websites. After reading these detailed instructions, you will be able to install WordPress in Ubuntu with ease. Preparing your Ubuntu server with the prerequisites for a WordPress deployment is critical before beginning the installation.
Verifying that your server satisfies the requirements is critical before beginning the WordPress installation process. If you meet these conditions, the WordPress Ubuntu setup process will go off without a hitch.
Before you start, make sure Ubuntu is installed on your server. The most recent Long Term Support version is the best option if you’re looking for stability and potential enhancements. If you haven’t already, you may download Ubuntu’s LTS version from their website and install it by following the instructions.

The LAMP stack—which stands for Linux, Apache, MySQL, and PHP—is the foundation of WordPress’s server environment. Run these commands in your terminal to configure the LAMP stack:
sudo apt update
sudo apt install apache2 mysql-server php libapache2-mod-php php-mysql
By executing these actions, you will set up a solid foundation upon which to build your WordPress site.
For some WordPress features and plugins to work as intended, you should install extra PHP extensions. Run this command to make sure specific extensions are installed:
sudo apt install php-curl php-gd php-mbstring php-xml php-xmlrpc php-soap php-intl php-zip
Before you can begin WordPress Ubuntu setup, you must create a special MySQL database and user. When you set up WordPress, you’ll need to know the following information about the database: name, username, and password.
sudo mysql
CREATE DATABASE wordpress;
CREATE USER ‘wpuser’@’localhost’ IDENTIFIED BY ‘wppassword’;
GRANT ALL PRIVILEGES ON wordpress.* TO ‘wpuser’@’localhost’;
FLUSH PRIVILEGES;
EXIT;
If you fill up all these boxes, installing WordPress on your Ubuntu server should go off without a hitch. This meticulous planning dramatically improves your WordPress site’s speed, safety, and reliability.
In order to build your website or blog, you must first download and configure WordPress. We have already taken care of the prerequisites for installing WordPress on Ubuntu.
Obtaining the most recent WordPress installation is the initial step. Launch the command prompt and go to the temporary folder:
cd /tmp
To retrieve the WordPress installation file, use the curl command:
curl -O https://wordpress.org/latest.tar.gz
After the download is over, open the zipped file and remove all of the contents:
tar xzvf latest.tar.gz
After extracting the WordPress files, you must transfer them to the root directory of the Apache document. To make a duplicate of the files, use these commands:
sudo cp -R /tmp/wordpress/* /var/www/html/
Doing so guarantees that Apache can access all of the required WordPress files.
The WordPress files must have their ownership and permissions changed if the environment is to remain safe. To assign proper rights and ownership, use the following commands:
sudo chown -R www-data:www-data /var/www/html/
sudo chmod -R 755 /var/www/html/
The web server Apache gets the rights it needs to view and alter files with these instructions, while other users get the proper levels of access.
Downloading and configuring WordPress on your Ubuntu server is now complete. The following stages in installing the software will be more manageable if you follow these procedures.
You must configure your Apache web server correctly for WordPress to integrate without a hitch. Here, we will walk you through the steps of setting up an Apache Virtual Host on an Ubuntu server to run a WordPress site.

Building a WordPress-specific virtual host configuration file is the initial order of business. To open the terminal and make changes to the configuration file, run the following command:
sudo nano /etc/apache2/sites-available/wordpress.conf
Place the following Apache configuration code within the file:
<VirtualHost *:80>
ServerAdmin webmaster@yourdomain.com
DocumentRoot /var/www/html/
ServerName yourdomain.com
ServerAlias www.yourdomain.com
<Directory /var/www/html/>
Options FollowSymLinks
AllowOverride All
Require all granted
</Directory>
ErrorLog ${APACHE_LOG_DIR}/error.log
CustomLog ${APACHE_LOG_DIR}/access.log combined
</VirtualHost>
When you’ve finished configuring everything, save the file and close the text editor.
To make Apache use the newly configured virtual host, turn it on when the configuration is complete. Carry out the subsequent instructions:
sudo a2ensite wordpress.conf
Enabling the Apache rewrite module is necessary for WordPress permalinks to work properly. In order to turn on the module, use this command:
sudo a2enmod rewrite
Last but not least, restart the Apache webserver to implement the changes:
sudo systemctl restart apache2
Apache is now ready to serve your WordPress site efficiently after these modifications. By optimizing the server environment in this way, WordPress is sure to run correctly.
After configuring Apache on your Ubuntu server, the next critical step is to install WordPress using the intuitive web interface. If you follow these procedures, your WordPress Ubuntu setup will be done efficiently and with little hitch.
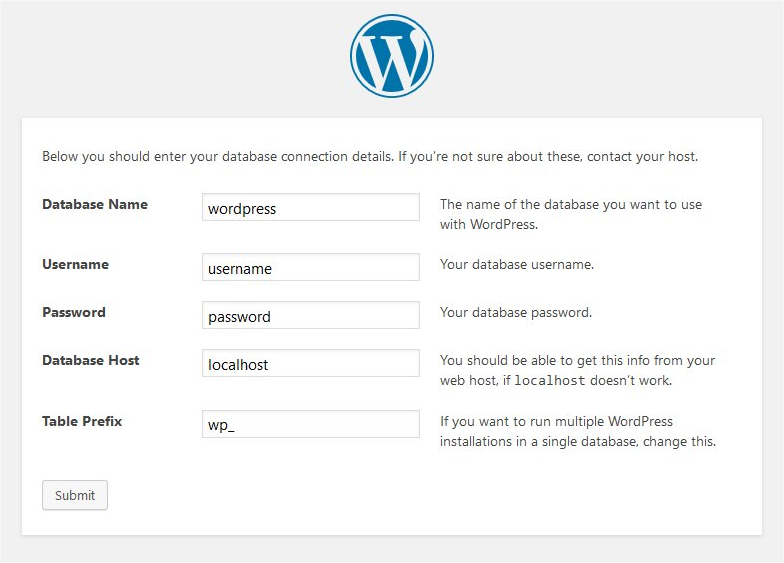
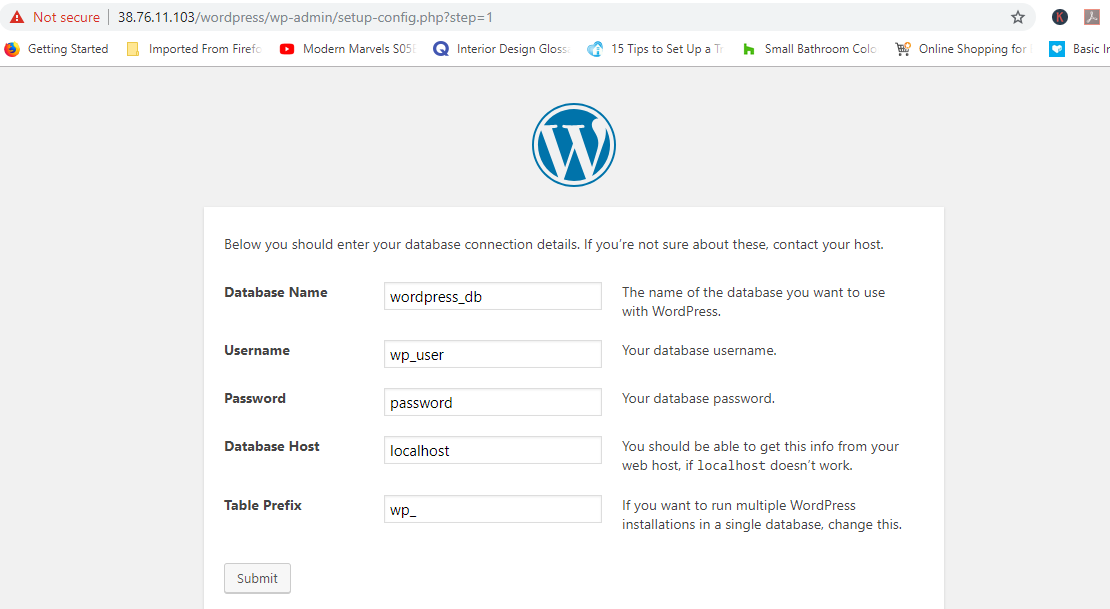
First, fire up your browser and go to your server’s address (or domain). When you go to the URL, the WordPress installation procedure will await you. In order to make the installation procedure easier, this wizard will walk you through each step. Keep the MySQL database credentials you generated earlier close to hand for your safety.
You will have to provide several important facts about your site during the WordPress configuration process. Along with providing a working email address, you must also choose a title and set up an admin account with a password. Furthermore, the “Search Engine Visibility” option will be available to you at this point. Keeping this unchecked is best if you don’t want search engines to index your site. It is a method that usually occurs when developing new websites.
To install WordPress, input your details and click the “Install WordPress” button. Pressing this button will start the installation, and you will get a notification when it’s finished. After the installation is complete, you will be able to access the WordPress dashboard with the credentials you used before. All of your website management functions are present in this dashboard. You may change the default settings, add new material, and discover all WordPress has to offer in there.
Maintaining a secure, reliable, and fast WordPress site is an ongoing process that begins with installation. To make your WordPress Ubuntu setup more secure, you might want to apply some crucial configurations:
Website security is of the utmost importance. Keep WordPress themes, and plugins up-to-date regularly to fix any security holes. Cybercriminals frequently target out-of-date software. Therefore, it’s essential to keep your software updated. Also, install and configure a robust security plugin like Wordfence or Sucuri to bolster your defenses. Firewall security, virus detection, and login attempt tracking are some of the functions offered by these plugins. These protect your WordPress site from a variety of dangers.
Add SSL/TLS encryption to your WordPress site to make it more secure. It will ensure that no one else can access the encrypted data sent between your server and visitors. For those in need of an SSL certificate, Let’s Encrypt offers a popular and free option. To set up SSL on your site effortlessly, install Certbot with the Apache plugin. Users increasingly expect websites to employ encrypted connections. Thus, this protects critical information and increases your site’s trustworthiness.
To safeguard your content and data, it is vital to implement a backup strategy regularly. Automate your backups with dependable plugins like UpdraftPlus or BackWPup. To swiftly restore your WordPress site to an earlier state in the case of data loss or a security incident, scheduling frequent backups to offsite locations or cloud storage is recommended.
Applying optimization strategies greatly enhances your WordPress site’s performance. W3 Total Cache and WP Super Cache are two caching plugins that you may use to speed up page loads by storing static material. Also, consider using a CDN to spread your site’s assets over several servers worldwide. As a result, the user experience improves, and the server burden is reduced, both speed up content delivery.
When you apply these extra parameters to your WordPress Ubuntu setup, a more robust, secure, and performant website will be yours for your audience. Keep ahead of ever-changing security risks and optimize site performance by regularly reviewing and updating these parameters.
You have laid the groundwork for your website or blog by installing WordPress on Ubuntu. You may install WordPress in Ubuntu server optimally, safely, and easily-maintained by following these precise procedures and thinking about other options. Have fun discovering all the features and options WordPress offers for managing and making dynamic content for the web.
Copyright@2018. All Right Reserved Themespride